Converting Your Garden Shed into a Castle for your Kids
This entry was posted on Jun 5, 2014 by speedy-bedAnybody who has kids will know that there is never enough space to keep them. Their toys take over every bit of floor space you have and their clothes hang from, well, everything you can hang things on.
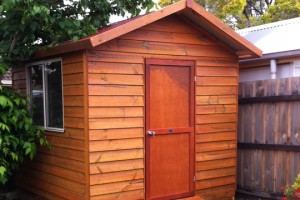
There’s no point in trying to fight the mess, so embrace it and try to move it elsewhere. But where? The garden shed of course! Just a little bit of DIY and you can turn that old storage shed into a fantastic play place for your kids, here’s how:
Clear Out and Clean
This is the hard part. The really hard part. You have to clear everything out of your trusty old garden shed and get rid of it. It may sound hard and that’s because it is. All those old bits and pieces you’ve been keeping for things that may happen, tools that have since been replaced and things you’ve stored and forgotten about need to be moved.
Once everything is out and rehomed or binned you need to give it a thorough clean. Make sure that you get all the dust and dirt out, as well as things like screws and nails as these can be extremely dangerous for kids. To get the best possible finish it is a good idea to sand down the walls and floor in order to create a smooth finish and reduce the chance of splinters.
Create the Castle
Castles are awesome and whether you have a brave little knight or a pretty princess they will love their new lair. There is another reason for choosing a castle, and that’s because it is a pretty easy conversion. The materials you will need are:
- Plywood & timber
- Guttering (for a moat)
- A jig saw (or a lot of patience)
- Hammer & screwdriver
- Nails & screws
- Paint & paintbrush
- A bit of skill
Depending on how competent and experienced you are, this project could take a few hours or a few weeks. It will also depend on how elaborate you plan on being with the conversion – drawbridges and chain ladders will take more time.
Cutting and Fixing
First things first, you need turrets – these can be cut out of weather treated plywood using the jig saw. Make sure you draw out the pattern you need first before cutting, making sure the turrets are well spaced and not wonky, that just wouldn’t do!
At this point you want to screw lengths of timber to the side of your shed, slightly below the slant of the roof, to create a 2-3 inch space between the roof and where you will be attaching the turrets. Then you need to install the guttering around the roof of the shed with it draining from behind– this will stop the water from pooling against the turrets and causing water damage.
Once the timber has been attached you can then go about nailing a supporting framework onto the turrets and then screwing the whole structure onto the timber. Make sure you have left space for the guttering to drain out. This will give you an absolutely basic castle for your kids and now it’s up to you to decorate!
Painting and Decorating
If you were going to get the kids involved, now is the best time. Get the paint out and get the basic brick outline going for the castle blocks and let your kids fill them in. This can be done in any sort of patterns or colours that you, or your children, fancy – there really are no rules.
Feeling really adventurous? Why not try knocking together some medieval looking furniture or paint the inside to carry on the castle-like feel? A rug and some boxes to store their toys in are also a good idea. An added bonus is installing electricity in the shed – your kids will be able to entertain themselves for hours without making a mess of the house!

